
| You are not logged in. (log in or register) | |
|
|
How'd They Do That? :: Stare
Stare by lovethelightPeople were curious about my post processing on "Stare." In order to address how I created the effect, I need to also address my skin and lighting editing for her face. I use photoshop CS3. I cropped in a bit so more detail can be shown. There are many things that I wanted to fix in this initial shot. The focus is a little soft, the lighting coming from below has created some strange shadows and there are imperfections in her skin. The colors and contrast are also quite pale. The first thing I always do with a portrait is address the cloning out of major imperfections. I like most of the retouching of the skin and other elements before I address lighting. This way, if I accidentally over-edit the lighting I can simply lower the opacity of the edited layer to retrieve the initial lighting without having to worry about loosing past use of the cloning tool or liquefy tool. So first I cloned out the major imperfections, as well as some incredibly minor ones. I use the clone too with full softness of the edges and 90% opacity. I always zoom in to 100% to make sure I don’t miss little things. Original Image cropped 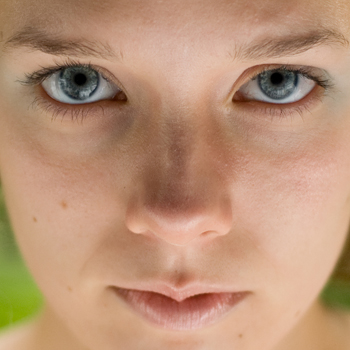  The lighting at this point was pretty bad. When I took the photo it was raining and we were under a dark covered porch. I used a silver reflector (one of those reflectors you use on the inside of your windshield to get your car from getting too hot mounted on a wooden stick) to bounce the ambient light behind her onto to her face. It was so dull that in order to get any extra light on her face at all, it ended up making a terrible shadow on her nose. I tried using curves to fix this, but in this case it didn’t work. Since the lighting was so uneven, when it was brightened it didn’t have the smoothness the portrait needed. So instead, I used the airbrush tool set to 30% opacity and 100% softness on the edges of the brush. I continually use the eyedropper tool (on a mac you press the option key to use the eyedropper) to pick up the color and brightness of the area I am working on. This creates a range of brightness and color in the airbrushing. I airbrushed her skin until it looked about right. I did so without worrying about skin texture. Then, I used the unsharpen mask at 189% with a radius of 1.3, very small, to bring back some of the texture in her skin. 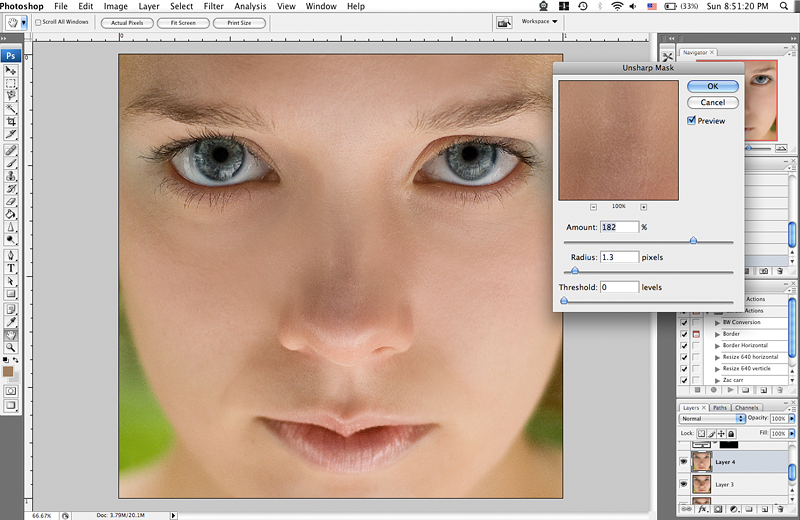 I then lowered the opacity of the airbrushed/sharpened layer to 85% so that the change would not look so fake. Then I did some basic corrections on her eyes. To clean up the reflections in the whites of her eyes I used the clone tool and subtle airbrushing. While I normally don’t move people’s features in portraits, for the symmetry of this photo I felt that some use of the liquefy tool was necessary. I used it to fix a dip in her eyelid and even out her lips a bit.This is the basic result of that changes: 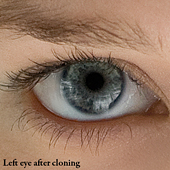 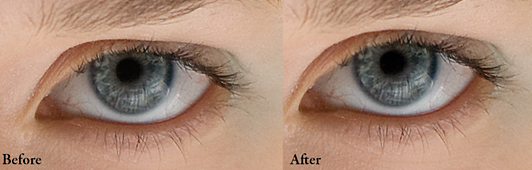 Then I began some lighting and color correction. I uses a levels layer in which I bring up the highlights and darken the shadow to boost contrast and bring in some more saturated colors color. Then I began to focus on her eyes. The initial elements that created the characteristic silver sparkle in Melissa’s eyes in “Stare” were silver reflector reflected in the bottom half of her eyes and the actual structure of the colors in her irises. To whiten the whites of her eyes I used a “Solid Color” layer set to white. I used a mask to isolate the whites of the eyes. I then set the layer to “soft light.” I then used a curves layer to darken the black ring around her irises. I then used a brightening curve layer to bring up the eyes again. To give the eyes their true pop, I used the dodging tool set to “midtones” and dodged to bring up the shadows around the pupil. Then I set it to “highlights” and did major dodging to bring up the natural texture of her iris. The effects of the tool were almost magic on this particular shot. 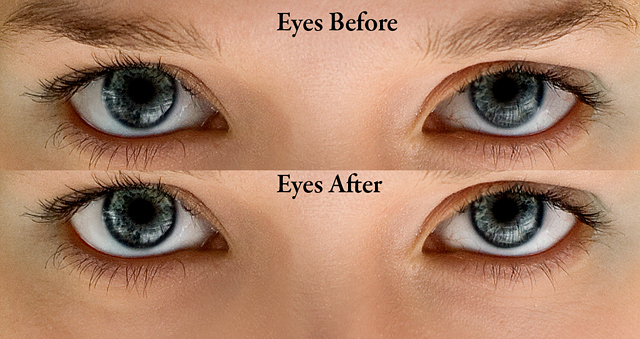 This brought in some yellows and greens into her iris, so I used a color balance layer to bring black the blue color. 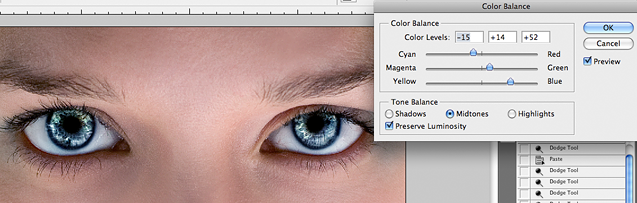 I then used the layer mask to apply the change in color only to her eyes. 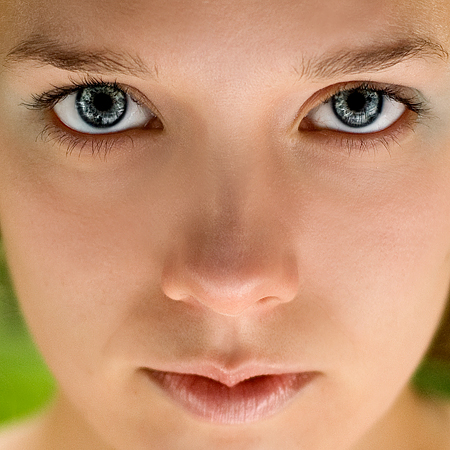 At this point, her skin is still pretty messy. Whenever I have uneven skin like this I duplicate the layer, and then airbrush the photo heavily, forcing the lighting scheme I want on the face. Then I accentuate it further using dodging and burning of features. I also added a Gaussian blur layer to take away some of the noise in the background. Then I sharpen the layer to bring back a little texture. Then I take the layer and lower the opacity dramatically so that the effect becomes subtle enough to look natural but still fixes the major problems. Airbrushed Layer 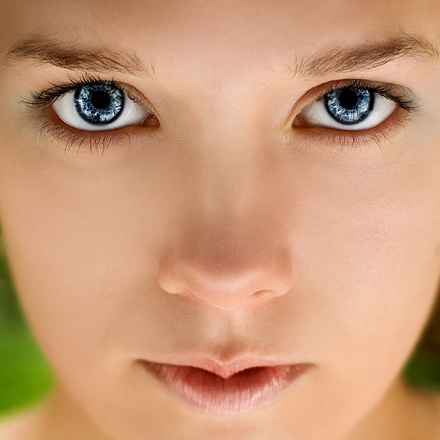 Final Image with lowered opacity of airbrushed layer 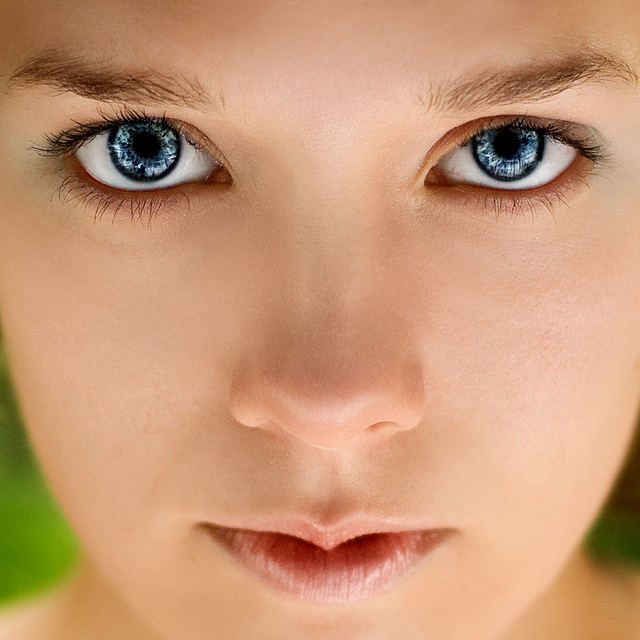 While this version differs slightly from the version I entered because I re-edited it for the purpose of this tutorial, it still presents the basic steps I used used to create this effect from a photo with rather serious light problems. Basic summary of the main techniques from this tutorial: - Do most of your cloning corrections before you do your lighting adjustments, just in case you go overboard with lighting editing. - When airbrushing, airbrush in a separate later and over airbrush to get the exact ratio of light that you want, no matter how unnatural looking. Then use the unsharpen mask at a small radius (between 1 and 2) to bring back some texture. Then set that layer at a low opacity (between 15% and 50%, depending on the look you are going for). - For very dramatic eyes, overly darken the border around the iris and use the dodge tool set to highlight to bring up the highlights in the eyes. Thanks for reading!
Home -
Challenges -
Community -
League -
Photos -
Cameras -
Lenses -
Learn -
Prints! -
Help -
Terms of Use -
Privacy -
Top ^
DPChallenge, and website content and design, Copyright © 2001-2024 Challenging Technologies, LLC. All digital photo copyrights belong to the photographers and may not be used without permission. Current Server Time: 04/25/2024 01:00:35 AM EDT. |
 Stare
Stare