
| You are not logged in. (log in or register) | |

|
|
Tutorials :: Blurring a Background in a Portrait
Blurring a Background in a Portrait by timj351These are some basic steps for blurring a background such as in a portrait photo while maintaining sharpness in the main subject. There are many more elaborate methods but I feel that this method will be easy to learn for someone relatively new to this kind of image editing. Start by doing some general enhancements such as levels or color correcting on your image to start off with an image that already looks good. Make a quick Save As at this point and at other key points along the way making sure it is a separate name from its original name. I am going to use a photo I took of my dog Bear to illustrate some of the steps as we go. 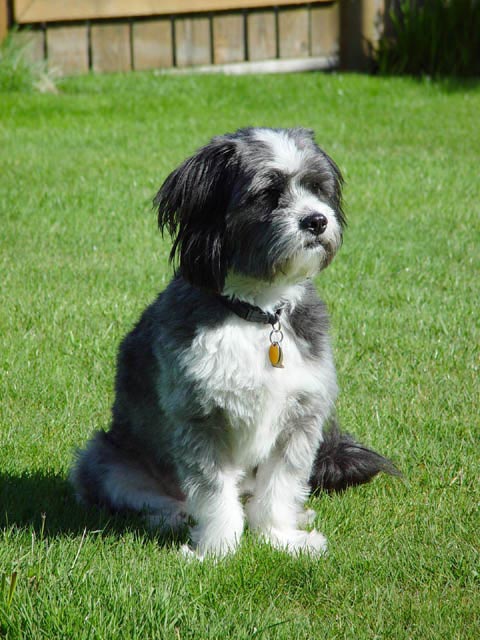 My intent here, since Bear is sitting in the grass, is to make the background begin to blur at a point on grass just beyond where he is sitting. This will be a slightly more dramatic blur than I would normally apply to help illustrate my points. To do this I first create a duplicate layer. The background layer will serve as the background with the blur and the duplicate layer will contain only the dog in sharp focus. Since the background will need to fade from a sharp foreground to a blurred background I am going to create a third new layer where I will create a colored gradient that I can make a selection from. I will explain. (Where some people use the masking tools I find it easier to simply create another layer with a gradient. It accomplishes the same thing). Create the new layer above the background layer as shown and then choose any bright color you want as your foreground color. Now select the gradient tool, choose Foreground to Transparent in the gradient editor, and apply it as shown. You will probably need to experiment a little with the amount of fade to the gradient but for now I am just using its default setting. If you hold down the Shift key while you are using the gradient tool it will constrain the direction either vertically or horizontally. The color of the gradient will represent where the background will be blurred and as it fades to transparent it will represent where the background remains sharp. 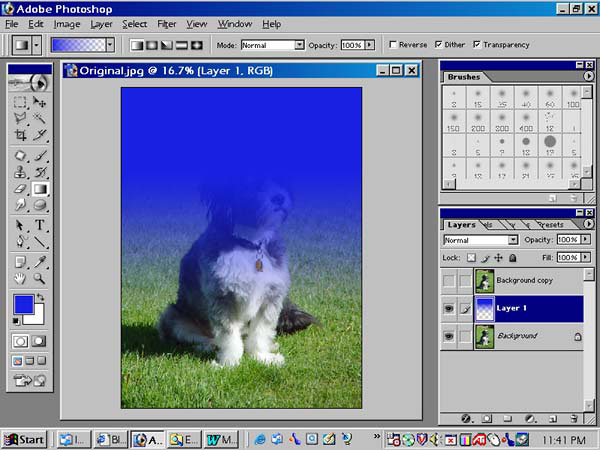 Now that I have made the gradient I will select it by holding down the Control key and clicking once on the gradient layer in the Layers menu. Notice how it is selected. With the gradient still selected I turn off the gradient layer and select the Background layer and apply a Guassean filter to the layer. I applied a radius of 50 for this exercise. Notice how it only blurred the background where the gradient was visible. It is supposed to blur the dog also on this layer. I can now deselect the selection. 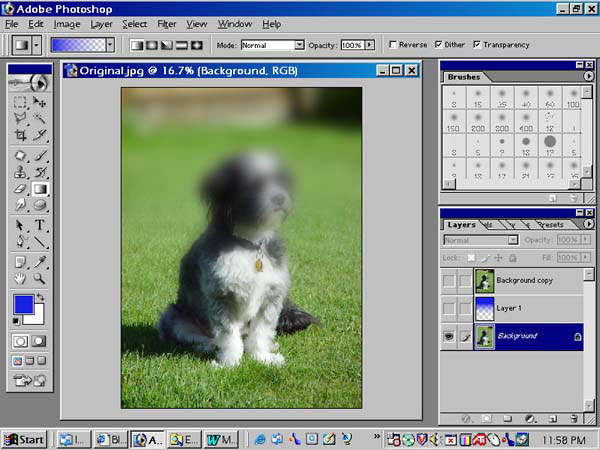 I now turn the duplicated layer back on. Suddenly everything is in focus again. What needs to be done now is to remove everything around the dog and there are several ways of doing this. I could simply erase out the background or better yet I will use the Polygonal Lasso Tool with the Feather set to between 2 and 5 (this is dependent on the amount of pixels in the image. Larger images may need a larger amount). I make a selection around the dog staying several pixels outside of him. Using this selection tool will probably takes some practice and it is important to be slow and methodical. Now I go to Select>Inverse to inverse the selection and hit Delete to remove it. If your picture contains a hard edge image you can set the feather amount to 0 and select very close to the edge to speed things up. In the case of this furry dog I gave myself some room to work with so that I could finish the edges with the eraser tool. 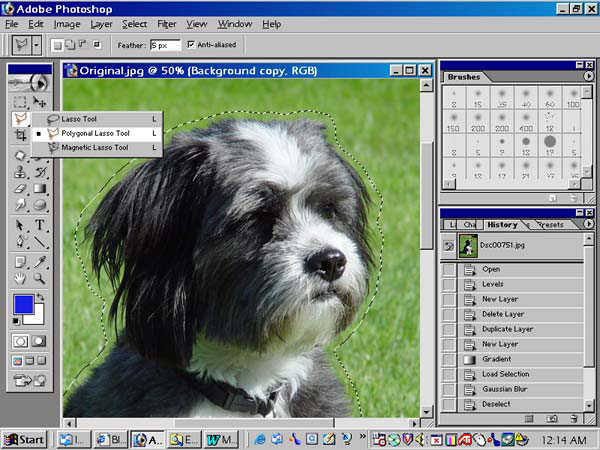 At this point I normally use my pen tablet to have maximum control over the eraser tool but for this excercise I am simply choosing some small sized soft edged brushes and quickly erasing the remaining background. Be sure to expriment with the opacity settings for the eraser tool so that you can be careful not to erase to much at a time. Small strokes work better then trying to erase a large amount at once. Sometimes I may need to go back several steps in the History menu to redo some areas. 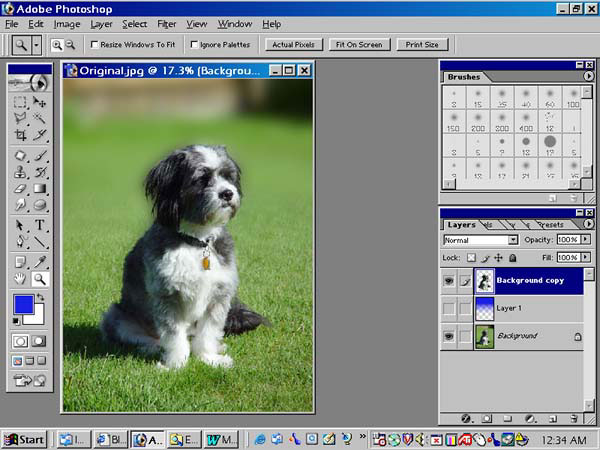 It is starting to look pretty good and this would be all you would need to do for many applications but with this particular subject I don't like the dark blurring of the dog that is still showing from the background layer. I can fix this by turning off the duplicate layer and cloning out the dog completely or at least the area that is visible. 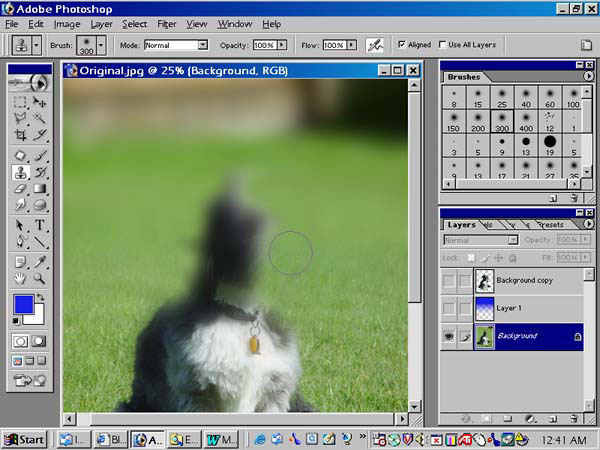 Now all I need to do is turn the duplicate layer back on delete the layer with the gradient and merge the layers. That's it. Now you can resize it, crop it further or save it as a separate file. 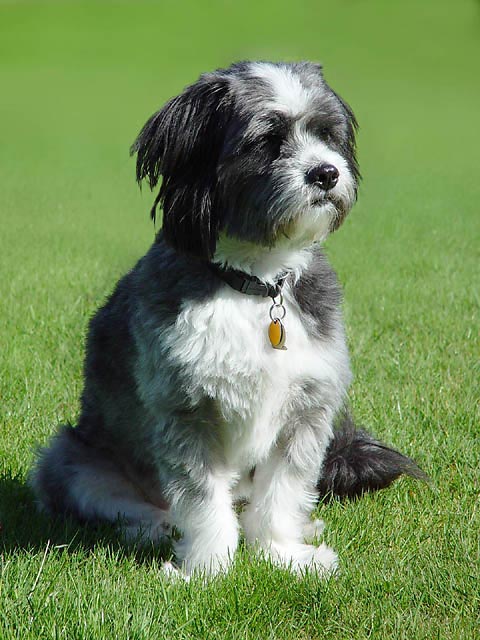
Home -
Challenges -
Community -
League -
Photos -
Cameras -
Lenses -
Learn -
Help -
Terms of Use -
Privacy -
Top ^
DPChallenge, and website content and design, Copyright © 2001-2026 Challenging Technologies, LLC. All digital photo copyrights belong to the photographers and may not be used without permission. Current Server Time: 04/15/2026 09:02:48 AM EDT. |