This tutorial will show you an easy way to correct a tilted horizon to help improve the composition of your picture.
The original photo

Notice how the horizon is not level in this photo.
Select the Measure Tool

We're going to use Photoshop's Measure Tool to find the exact angle needed. The measure tool is hidden under the eye dropper. Click-and-hold on the eye dropper to reveal a pop-out menu and select the ruler at the bottom. Or, press Shift+I on your keyboard to cycle through the icons until the measure icon ruler appears.
Draw a line along the horizon

Using the Measure Tool, draw a line along a feature that you
want to be either horizontal or vertical in the final image. In this case, we'll use the horizon line (look carefully and you'll see the black line and two end points marked with a "+" symbol). To draw the line, click-and-hold the mouse button to place the starting point,
drag to the finish point, then release the mouse button. If you don't get your line quite right the first time, you can just click-and-drag another measurement line.
Rotate the image
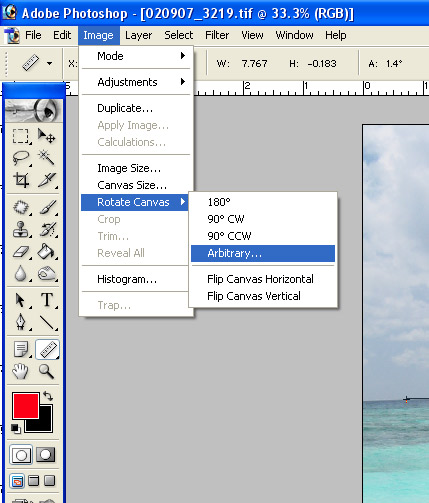
To perform the rotation, simply choose the Image > Rotate Canvas > Arbitary... menu item. Because we used the Measure Tool, the exact angle of rotation needed to level the selected line is already present and you can just click "OK".
Final result

This is the result of the rotation. Notice how the horizon is now straight, and that the current background color
was used to fill the areas of the canvas generated by rotating the image. You now need to crop the image to remove these areas, use the Clone Tool to expertly remove them, add a large enough frame to obscure them, etc.
