| You are not logged in. (log in or register) | |
|
|
|
Tutorials :: Resizing Pictures to Standard Print Sizes
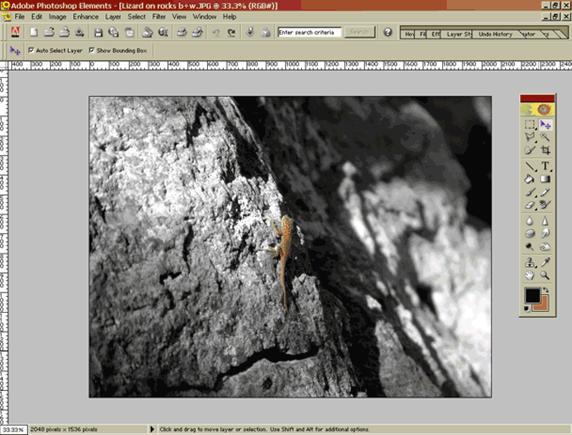
Resizing Pictures to Standard Print Sizes by ginjerResizing Pictures to Standard Print Sizes Understanding Aspect Ratio The first step in resizing pictures is understanding aspect ratio. The aspect ratio is the longer side of the picture divided by its shorter side. This ratio is determined by the CCD in the camera being used. Most digital cameras have an aspect ration of 1.33:1 because this corresponds to the aspect ration of a standard computer monitor. Some high-end cameras and digital SLRs have an aspect ratio of 1.5:1, corresponding to the aspect ratio of 35 mm film. Printing digital pictures is something like watching DVDs on a standard television. A standard television has an aspect ration of 1.33:1 just like a computer monitor. A movie screen, however, has a ratio of 1.78:1 (usually seen as 16:9). The larger aspect ratio means that the movie screen is much less square than a television. Therefore, DVD movies are either in wide-screen format with black bars at the top and bottom to accommodate the shape of the television or they are in full-screen format with the sides cropped to fit on the screen. The dilemma is similar with photographic prints. A 4x6 picture has an aspect ratio of 1.5:1 (6 / 4 = 1.5). Like the movie screen, it is less square than the image captured by a standard digital camera. To make image fit the shape of a 4x6 print, borders need to be added to the longer side of the image to make it less square or the shorter side needs to be cropped. The reverse is true for an 8x10 which has an aspect ratio of 1.25:1 (10 / 8 = 1.25), making it more square than the standard digital capture. To make the image fit the shape of an 8x10 print, borders need to be added to the shorter side or the long side needs to be cropped Understanding Image Resolution Image resolution becomes important when it is time to print an image. A resolution of 300 pixels per inch should give excellent print quality while a minimum of 150 pixels per inch is generally considered acceptable. Resolution is the number of pixels on a side divided by the output size. An image that is 3000 pixels by 2000 pixels would have a resolution of 500 pixels per inch if printed at 4x6 (3000 pixels / 6 inches = 500 pixels per inch), 250 pixels per inch if printed at 8x12, 200 pixels per inch if printed at 10x15, or 125 pixels per inch if printed at 16x24. Resizing for Print The following examples will use this picture which is originally 2048 pixels wide by 1536 pixels high.
Resizing the image without borders To resize an image in Photoshop for printing a 4x6, click on the Rectangular Select tool (M on the keyboard). In the tool options select Fixed Aspect Ratio as the style, set either the height or width to 6 and the other to 4. Select the desired portion of the image to be printed. The selection can be moved but it will need to be redrawn to be resized. Once the desired selection is made, open the Image menu and choose Crop.
To verify the size and check the print resolution, open the Image menu and select Resize Image. Ensure that the Resample box is not checked. An image I cropped to a fixed aspect ratio of 6 by 4 is now 2048 pixels by 1365 pixels. At the default resolution of 72 pixels per inch, it shows a Document Size of 28.444 inches by 18.958 inches. Changing the width to 6 inches also changes the height to 4 inches (approximately) and the resolution to 341.333 pixels per inch. Doing so verifies both that the print is properly sized and that the resolution is acceptable for the desired output size. Changing the width to 24 inches would change the height to 16 inches and the resolution to 85.333 pixels per inch. The resolution of this image is too low to print an acceptable 16x24 print, but it will make an excellent 4x6 print. Changing the resolution to 150 pixels per inch will show that the maximum acceptable print size for this image is approximately 9 inches by 13 inches.
Resizing the image with borders Sometimes too much is lost in cropping to fit a standard aspect ratio. In such a case, it may be preferable to add an uneven border to make the image fit a standard size, like the black bars on the wide-screen format DVD. Borders may also be added to increase the number of pixels, and therefore the print resolution, without resampling the image. Open the Image menu and select Image Size. A sample image that is 2048 pixels by 1536 pixels at the default resolution of 72 pixels per inch, shows a Document Size of 28.444 inches by 21.333 inches. Ensuring that the Resample box is not checked, set the height to 4 inches. The width changes to 5.33 inches and the resolution to 384 pixels per inch. For this step it is necessary to make sure that both measurements are the same as or smaller than the desired output size, in this case 4 inches by 6 inches.
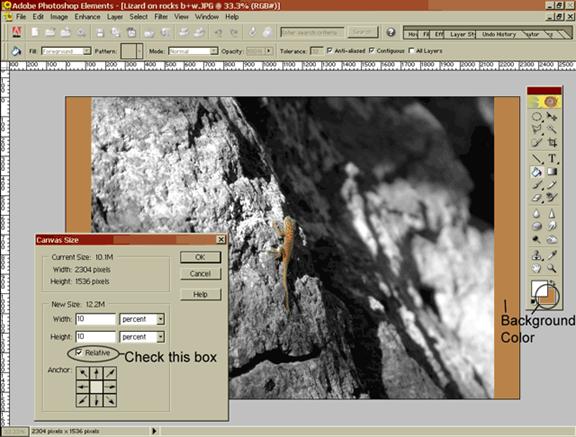
Add the border by opening the Image menu and selecting Canvas Size. For this example, change the width to 6 inches. Doing so will add bars to either side of the picture. By default, these bars are the background color.
To finish the image, open the Canvas Size dialog box again, change the units to percent for both the height and the width and check the Relative box. Increase both the height and width by the same amount, say 10 percent, so that the image is bordered on all sides. Using equal percentages to add the extra border maintains the desired aspect ratio.
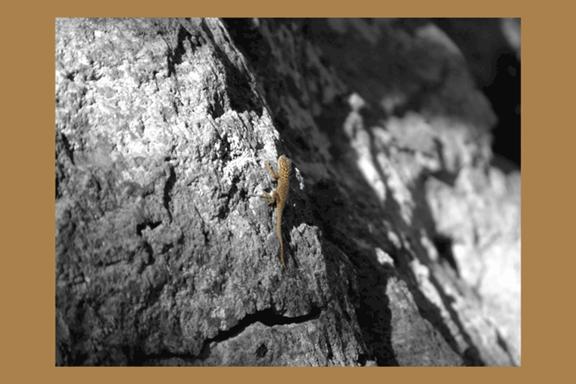
Final Image:
Returning to the Image Size dialog box shows that the image is now 2534 pixels by 1690 pixels. The resolution stayed at 384 pixels per inch so the size is now 6.599 inches by 4.401 inches. Changing the width to 6 inches will confirm that it is still the proper aspect ratio to print at 4x6, which would now print at 422.333 pixels per inch. While unnecessary to change the size, it may be reassuring to confirm the settings are still correct. Changing the width to 24 inches shows that the image is still too small to print at 16x24, as this size only yields a resolution of about 105 pixels per inch. Setting the resolution to 150 pixels per inch show that the maximum acceptable print size is now 11.3 inches by 16.9 inches.
Home -
Challenges -
Community -
League -
Photos -
Cameras -
Lenses -
Learn -
Help -
Terms of Use -
Privacy -
Top ^
DPChallenge, and website content and design, Copyright © 2001-2026 Challenging Technologies, LLC. All digital photo copyrights belong to the photographers and may not be used without permission. Current Server Time: 07/14/2026 12:23:21 PM EDT. |