
| You are not logged in. (log in or register) | |

|
|
Tutorials :: Cloning Tutorial
Cloning Tutorial by kiwinessThe two photos for this photo tutorial you can find here: clone_1.jpg; clone_2.jpg The original photo was created using Photoshop 7. This tutorial is being written using Photoshop CS2, however all the commands are the same. There are different methods which will reach the same result and I am still experimenting with different functions and masking effects, but I am writing this tutorial using the method I have used with all my cloning images so far. There is probably an easier way? The first and most important part of creating a cloning image is to have an idea. Think of something original, sketch it out on some paper, or have an image of what you want to do in your head and get prepared for the photo shoot. Important is that you use a tripod so that the background is always the same in every shot you take. I usually use the timer on the camera and run over to where I want to be and take up position. A remote control is also possible, but not very advantageous if you want to be seeing both your hands in the photo. Important is to take many photos! More than you think is necessary because the positions may not always be fitting for the final image. The more photos you take the better. Also remember that when taking photos outside the lighting conditions are constantly changing, so shoot in RAW and in manual whenever possible. To the processing side of things: First open both the files clone_1.jpg and clone_2. jpg in Photoshop (I don�t know how to use anything but Photoshop so I cannot say how it is done in other programs). Using the "move" tool together with holding the "shift" key, pull "clone_1.jpg" onto the "clone_2.jpg" photo, this will result in "clone_2.jpg" now consisting of two layers. The reason for holding the "shift" key while doing this is that both photos will be exactly centered. Close the original "clone_1.jpg" photo as you will not be needing this anymore. It is always a good thing to name your layers or else you will get lost later on when you have 20 or 30 layers in the layer palette. All you need to do is double click on the name of the layer and type in the new name. I named these layers "kiwi_1" and "kiwi_2". 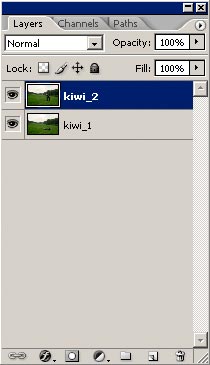
Using the "Opacity" slider at the top of the "Layers" palette, look at how the two photos are interacting with each other. Slide it back and forth a few times and you see that the critical interacting parts are where the swords and the legs are meeting. The next part is the most critical part of the whole process, because if this is not done accurately then any sloppy work will be noticable in the final image. Making sure that the "kiwi_2" layer is highlighted in the "Layers" palette, click on the pen tool to outline what you need from the top layer. What is needed is the top part of the "kiwi_2" layer pushing the sword into the chest of the "kiwi_1" layer. The legs will be hidden behind the clone laying on the ground so we don�t need those in our path. The top part is the easiest because the background is the same in both photos, so we can just roughly run the pen tool around with no real precision. The tricky part is where the two photos interact with each other. We have to zoom right into these areas and constantly changing the layer opacity we draw an accurate path around the swords and body contours. It takes a lot of time, but the more time you invest, the more accurate it will be. Here is a screen shot where the top layer is set at 55% opacity. 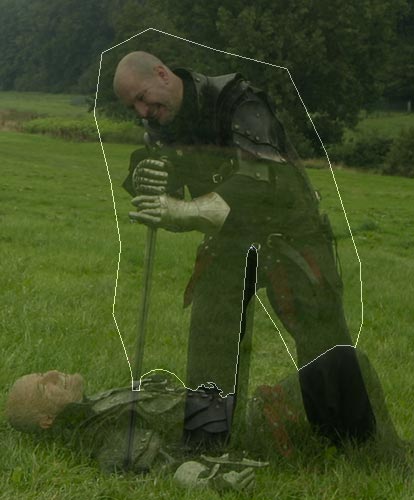
Once our path is complete we switch to the "Paths" palette and see there is a path called "Work path". We have to save this by clicking on the little black triangle in the upper right hand corner of the "Paths" palette, click on "save path" and give it an appropriate name. Click okay and this path is saved, and will not disappear once you start drawing another path. The next step is not to create a selection of this path (although it is something I have been experimenting with lately). What I did was switch back to the "Layers" palette, and make sure that the opacity of the top layer is set back to 100%. Now go to the "Layer" menu, and click on "Vector mask" / "Current path". Everything that is unwanted in the top layer is now masked out completely and we have the two "kiwis" interacting with each other. Notice that the path is still active here and that a vector mask has been added to the top layer in the "Layers" palette. 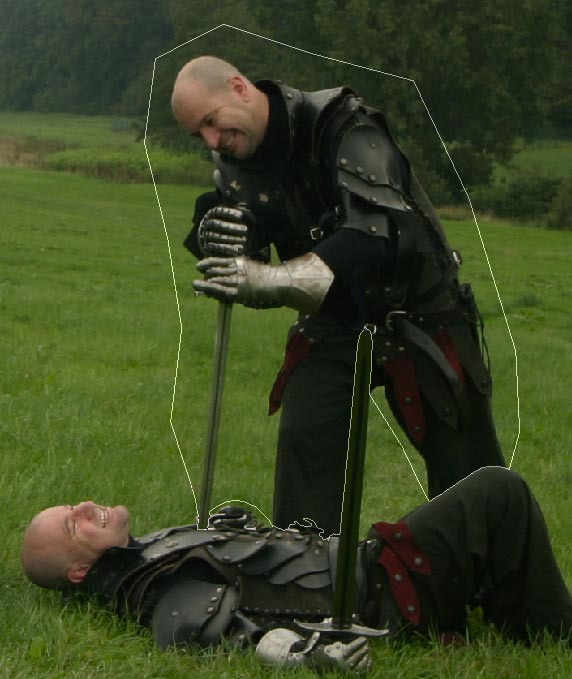
What I like about using vector masks here is that you can use the "Move" tool to move the top layer exactly to the position you want, a kind of fine tuning. However if you have done everything accurately so far then that is not really necessary. Also you can still adjust the path using the usual pen path editing tools. Once you are ready we need to rasterize the mask. Go to the menu "Layer"/"Rasterize"/"Vector mask", and now it is set in position and the path lines disappear. The vector path is now an image layer mask. If you look around where the two bodies meet you will see some hard lines, especially where the legs meet here: 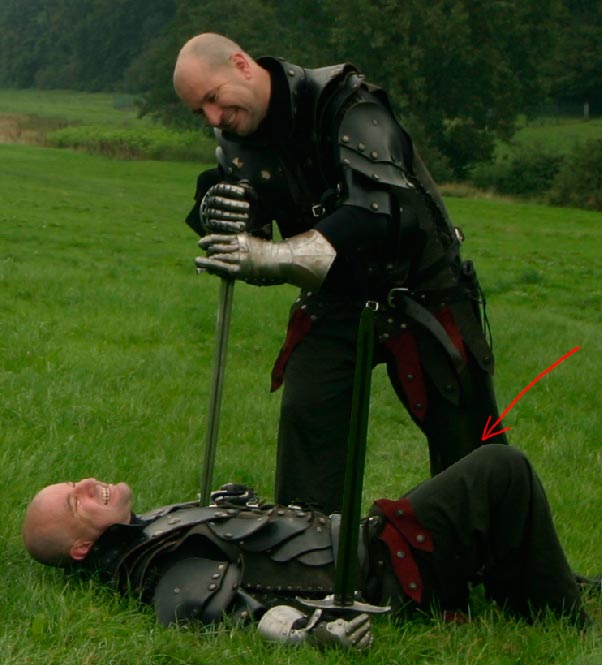
To get rid of these we have to soften up the mask a bit. Activate the image layer mask and go to "Filter"/"Other"/"Minimum" and choose a pixel radius of about "1". You can vary this to however you drew your path. This filter pulls the path back somewhat to subtract any unwanted pixels you might have included from the lower layer. Click on "OK" and you can fine tune this by going to "Edit"/"Fade minumum" I faded to 40% here. Now we have to soften up the edges somewhat. Go to "Filter"/"Gaussian blur" and set it at about 1 pixel, maybe more if the edges are not soft enough. Again you can use the "Edit"/"Fade" function to fine tune this. 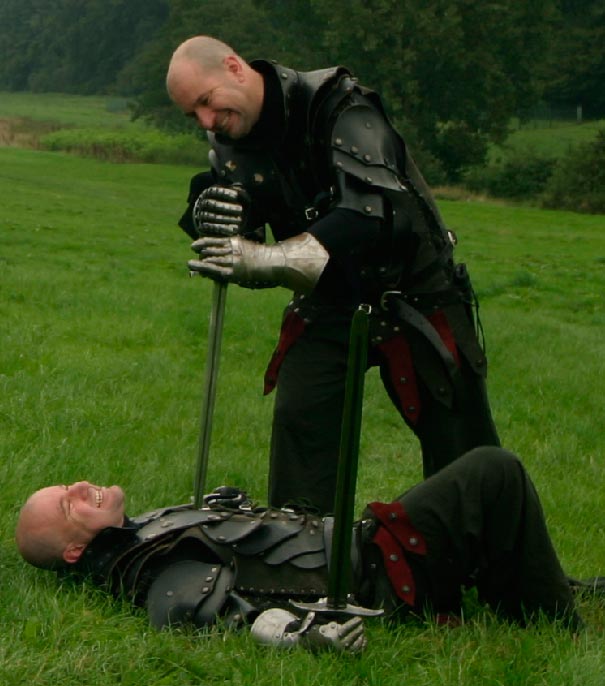
Seeing that you have used an image layer mask to isolate each layer you have not erased any pixels at all and can edit it at any time. That is it! Do the same for every new layer you pull into the original image and you should have a pretty good cloned image as a result. I hope it works for you. Thanks Gary
Home -
Challenges -
Community -
League -
Photos -
Cameras -
Lenses -
Learn -
Help -
Terms of Use -
Privacy -
Top ^
DPChallenge, and website content and design, Copyright © 2001-2026 Challenging Technologies, LLC. All digital photo copyrights belong to the photographers and may not be used without permission. Current Server Time: 04/05/2026 04:01:01 PM EDT. |