
| You are not logged in. (log in or register) | |
|
|
|
Tutorials :: Changing the Field of View Using Zoom
Changing the Field of View Using Zoom by levyj413Changing the Field of View Using Zoom We often think of zoom lenses as letting us bring distant objects closer. And usually, that's how we use them (well, that's usually how I use them, anyway). But zooms can also be used to change how much you see of the background. The higher the zoom, the less you'll see of the background; the field of view shrinks. This is useful to know when you can stand at various distances and use zoom to make your subject the size you want it. The zoom amount is up to you, so next you should think about the background. I've used this to my advantage to either include or exclude something in the background. Some filmmakers like Alfred Hitchcock use it to produce interesting effects, where the subject remains the same size but the background seems either to shrink away or come crashing inward.
Now, look at these four photos, all taken at different distances from the main subject: the tree in the middle plus some space to either side. As in the diagram above, I changed the zoom to keep the tree the same size in each photo. Keeping in mind the discussion above, try to guess which direction I was moving:
Now for your assignment: try this yourself! Pick some subject and, keeping it the same size within the frame, take shots at various distances and zooms.
Home -
Challenges -
Community -
League -
Photos -
Cameras -
Lenses -
Learn -
Help -
Terms of Use -
Privacy -
Top ^
DPChallenge, and website content and design, Copyright © 2001-2026 Challenging Technologies, LLC. All digital photo copyrights belong to the photographers and may not be used without permission. Current Server Time: 05/12/2026 05:00:47 AM EDT. |
 Here's a diagram showing what happens. For each shot, the subject fills the frame horizontally. As you move back, you increase the zoom, always keeping the subject filling the frame. Imagine the subject being a bench, over which you see the background. Note how the background changes in each shot:
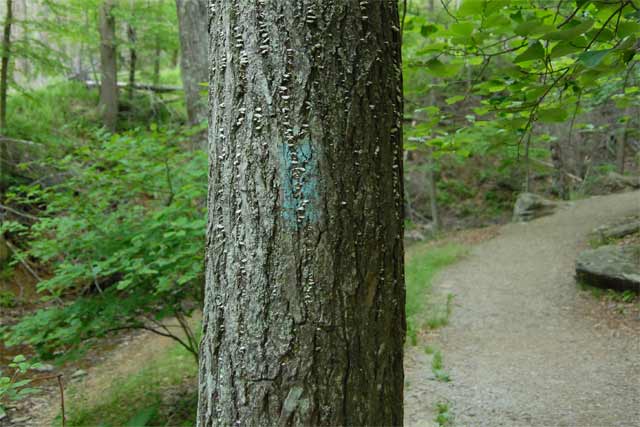


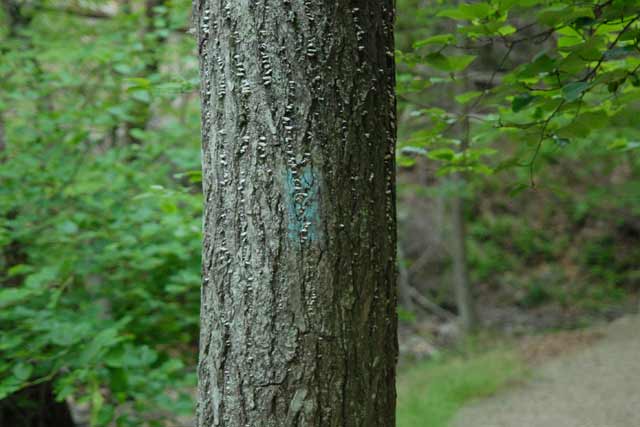
 If you guessed I was moving away from the tree, you're right! Here's the diagram: