
| You are not logged in. (log in or register) | |
|
|
Tutorials :: Non-Destructive Dodge and Burn
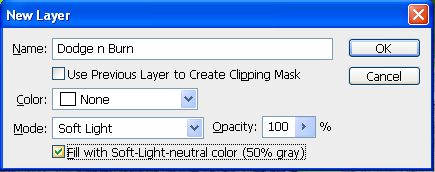
Non-Destructive Dodge and Burn by Monique64Dodge and burn can be applied directly to the image using either the original image or a duplicated layer. However in both cases you are modifying the image. The side effects can be an alteration in the hue and a change in pixel arrangement. So how can we dodge and burn without changing/altering the original structure or colour of the original file The following method will not only allow you to this but will also allow you to dodge and burn with colours!! Lets get started.
Now your ‘Layers Palette' show look like this. 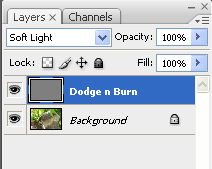
Before we can start dodging and burning we need to make sure of a few more settings.
Your brush should look like the image below. 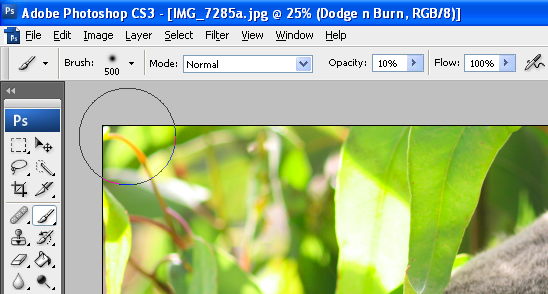
Now we can start dodging and burning. Make sure that the 50% grey layer in you ‘Layers Palette' is highlighted and begin to dodge and burn. Remember that what you want darker needs to be burnt using black and what you want lighter needs to be dodged using white. You can change brush size and brush opacity as you are working to suit your need. You can swap between black and white on you colour patch by either clicking on the switch arrows or by using your ‘X' key on your keyboard. 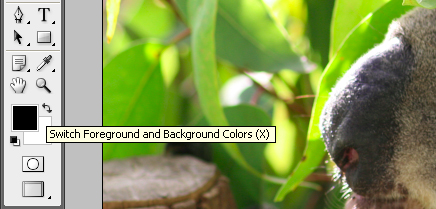
So what if you take a dodge or burn too far. Easy! Click on the foreground colour patch and in the colour picker window choose a 50% grey. You then paint this on to the image, restoring any mistakes. (Remember that you must still be on the grey layer.) Once you have dodged and burnt to your hearts content you should have a picture that looks great. You can see from the image below what the 50% grey layer looks like once you have worked on a picture. 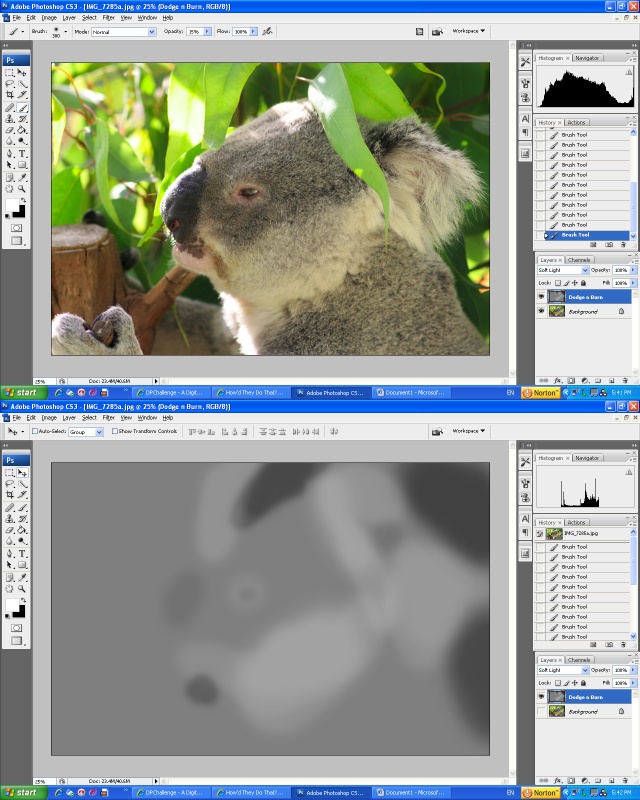
Now remember I said that you can also use colour using this technique. Now the picture I have been using up until now does not lend itself to burning with colours so I will change to another picture. All the steps are the same as if you are dodging and burning but instead of burning with black you click on the foreground colour patch and select the colour of your choice. Then paint this onto you picture making sure that the 50% grey layer is highlighted in you colour palette. 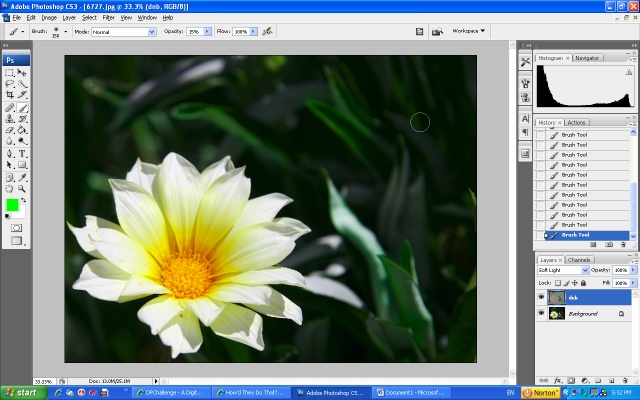
You can easily check how your picture is progressing by turning off the eye on the 50% grey layer to look at your original picture. This technique can be used in colour images and also in monochrome images. Using a soft splash of colour on a monochrome can be just what is needed to make an ordinary picture into an extraordinary one. 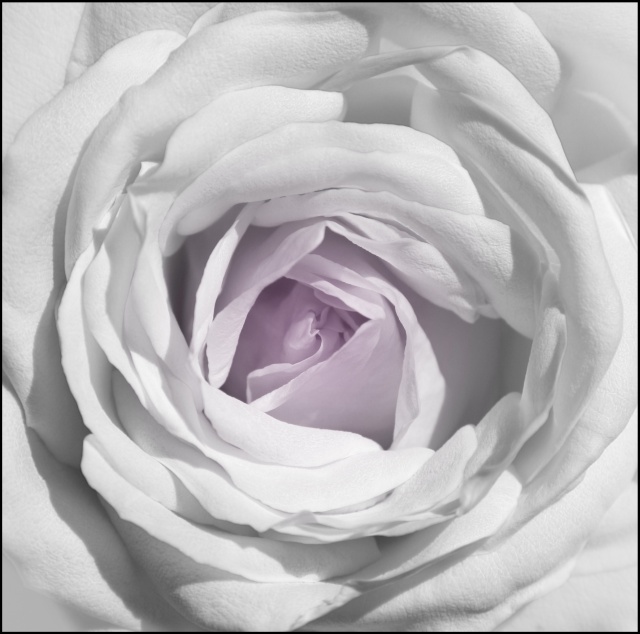
If you are someone who likes to use the dodge and burn feature in your tools palette you will find that the quality of your images will improve by using this non-destructive process. Dodging and burning by using this method is by no means unique but I wanted to share it with ones who have not yet discovered it. It is important to note that this is not a substitute for a poorly exposed photo but is fantastic for highlighting or downplaying certain parts of your image.
Home -
Challenges -
Community -
League -
Photos -
Cameras -
Lenses -
Learn -
Help -
Terms of Use -
Privacy -
Top ^
DPChallenge, and website content and design, Copyright © 2001-2025 Challenging Technologies, LLC. All digital photo copyrights belong to the photographers and may not be used without permission. Current Server Time: 04/01/2025 03:35:22 PM EDT. |