| You are not logged in. (log in or register) | |
|
|
Tutorials :: Fire Tutorial
Fire Tutorial by purpleflutterby13Getting the right exposure The tricky thing about flames is that the balance between a perfect exposure and blown highlights everywhere is quite delicate. Picking the right aperture is the key to controlling it. Mostly I find that shooting at about f8-10 at ISO200-400 tends to be about right, but it's something you have to adjust according to the size of the flame. Keep an eye on the histograms of your shots: if you're getting blown highlights, decrease the ISO or increase the f-value of the aperture. If you've gone too far and the flames are dying, bump the exposure up again. And since it's something that varies over time as things burn out, you will have to watch it and adjust it accordingly.
The effect of changing the aperture on flame trails The shutter speed should be adjusted to determine the size of the trails you want (between 0.5 and 2 secs tends to work). And bear in mind the shutter speed will only affect the blown highlights if the flame is standing still - for moving flames, always shoot in manual mode, adjusting the aperture first, and then play with the shutter speed to get the image you want.
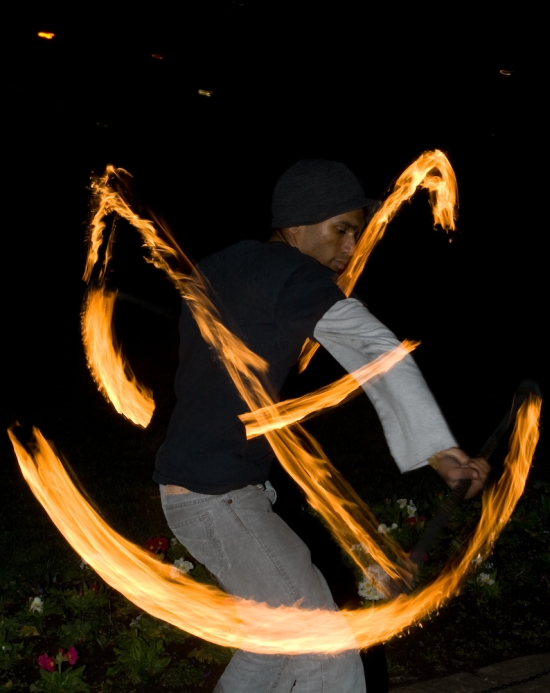
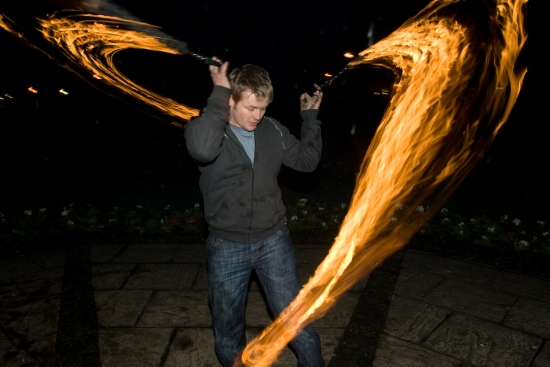
Isolating the (non-flame) subject Your flash is your friend. Adjusting your flash to 'rear curtain sync' means that it flashes at the end of the exposure, giving you all those nice trails, ending with a still figure in mid-movement. Ideal for photographing performers. If you have the gear needed, what you're basically trying to do is your best portraiture lighting setup around the performer, but with the added feature of a long exposure to get the trails along with using flashes to capture the person. A problem you might encounter is that the colour balance is off - flames are much warmer than your flash. Either use gels to balance it out, or keep the flash quite gentle.
You're still using a P&S, and don't have an adjustable flash? Don't worry about it. You can either blur out the person altogether, or get them to stand still for a funky silhouette effect.
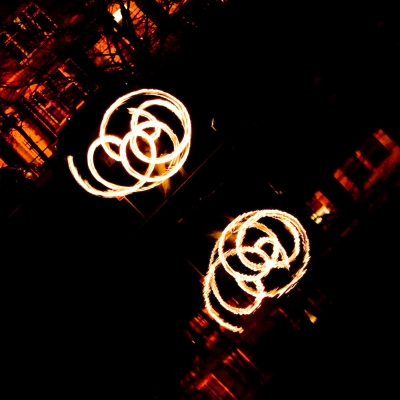
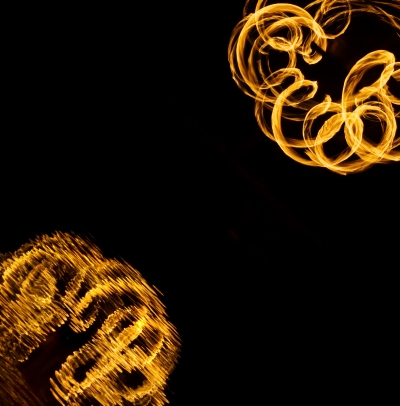
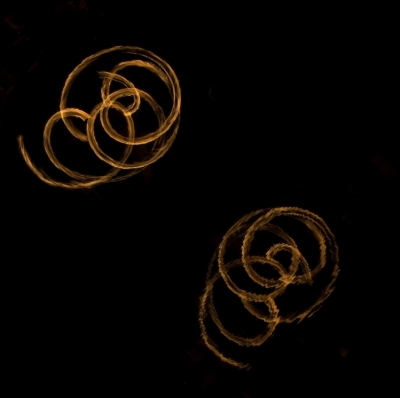
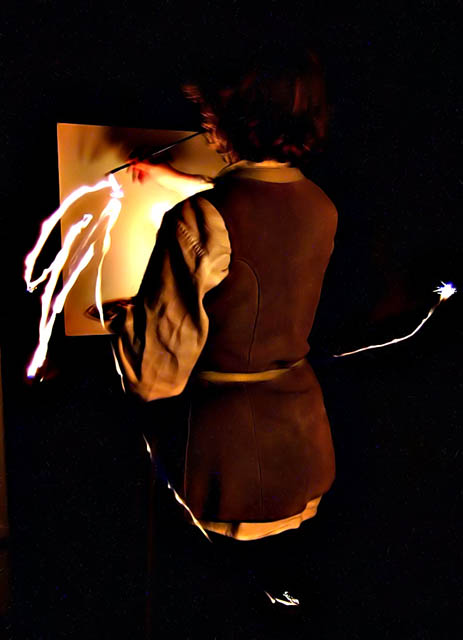
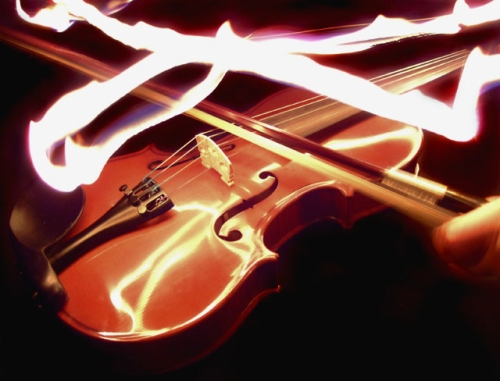
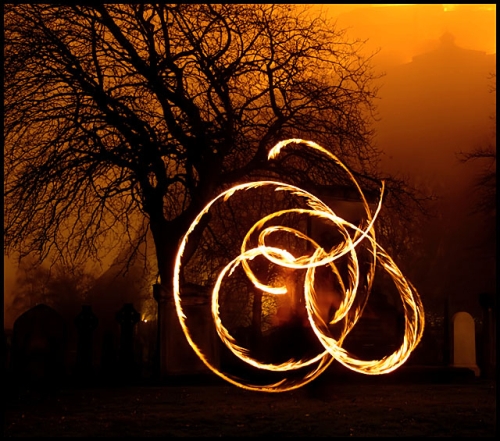
Fire painting The principle is identical to light painting, but with the added trickiness of fire photography. You can make fire trails with a flame and use them for artistic effect (any flame will do, but if you do this with any frequency indoors, I'd strongly advise investing in a Zippo), or you can use one or more large flames as your main light sources for some interesting adventures in fire portraiture. The possibilities are endless.
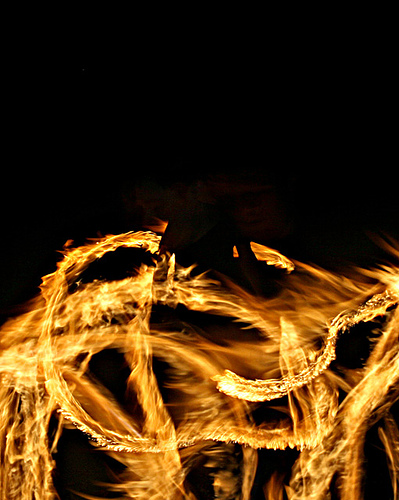
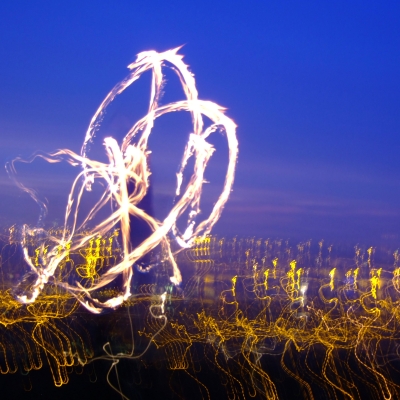
Please stay safe while you're doing this by the way - have a bucket of water and a fire blanket nearby just in case. Some of my previous accidents have included carpets on fire, 5am fire alarms, and scaring off large flocks of swans :) . Camera tricks for arty fire trails To make the flames in a photo more interesting, you can apply any technique that alters the position of the flame in the photo. This includes panning, zooming in and out during a long exposure, just moving a camera in a particular pattern (like a circle or a heart shape :) ). If you're using flash, your subject will be frozen at the point where your flash fires, whereas what you do during the rest of the exposure, and what kind of flame patterns you end up with as a result, is entirely up to you.
Zoom burst and panning examples Scenery Fire spinning shots get boring after a while. A way to make them more interesting is to combine them with surroundings in some way. Find any nearby abandoned castles, work with sunsets, that sorta thing. Water is nice because you can get some interesting reflections going. Snow or mirrors would work similarly. Just use your imagination, spend some time searching for good locations, then see what you can come up with!
And most importantly - have fun, and keep on playing! Good luck, and enjoy the mesmerising medium of fire :)
Home -
Challenges -
Community -
League -
Photos -
Cameras -
Lenses -
Learn -
Help -
Terms of Use -
Privacy -
Top ^
DPChallenge, and website content and design, Copyright © 2001-2025 Challenging Technologies, LLC. All digital photo copyrights belong to the photographers and may not be used without permission. Current Server Time: 04/01/2025 03:35:21 PM EDT. |