
| You are not logged in. (log in or register) | |
|
|
|
Tutorials :: A Quick Visual Guide To Resampling
A Quick Visual Guide To Resampling by PatellaA Quick Visual Guide To Resampling First, a little caveat: I'm not about to claim I'm an expert on this. This is something I've picked up on my own after doing a very little research. The numbers presented here may, or may not, be the best for what you want to do. They are intended as examples only. If you have an image that you'd like to print larger than it really is, you may be tempted to tweak a few numbers in Photoshop's Image Size dialogue (or the equivalent option in your favorite imaging software). 
I'll assume you know the basics of this dialogue box. This tutorial will focus on methods of resampling and the best way to pump up the size of your image without introducing too many artifacts. The examples that follow were obtained from this image. 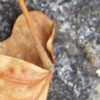 I resampled/enlarged this image 400% in 4 different ways. The first three are all simple selections in the resample image portion of the above dialogue box: Nearest Neighbor, Bilinear, and Bicubic. The fourth is a slightly more convoluted method involving the Bicubic mode which I will describe in more depth later. This is what I managed to create.  Do we even need to discuss why you probably don't want to use Nearest Neighbor? Bilinear appears to be the softest image and there is a certain amount of discernible pixellation. The differentiation between Bicubic and Bicubic SI is still harder to see. However, if you look at the shadowed portion of the leaf, you should be able to see that Bicubic holds less information than Bicubic SI. It's a very subtle difference that may be hard to see, but it basically manifests itself as a smoothness and lack of contrast. (For want of a better description.) The difference between the three is even more apparent after sharpening. (Please note, I oversharpened these images to make the differences between them readily apparent. I used a 500, 1, 4 ratio in Photoshop's USM filter.) 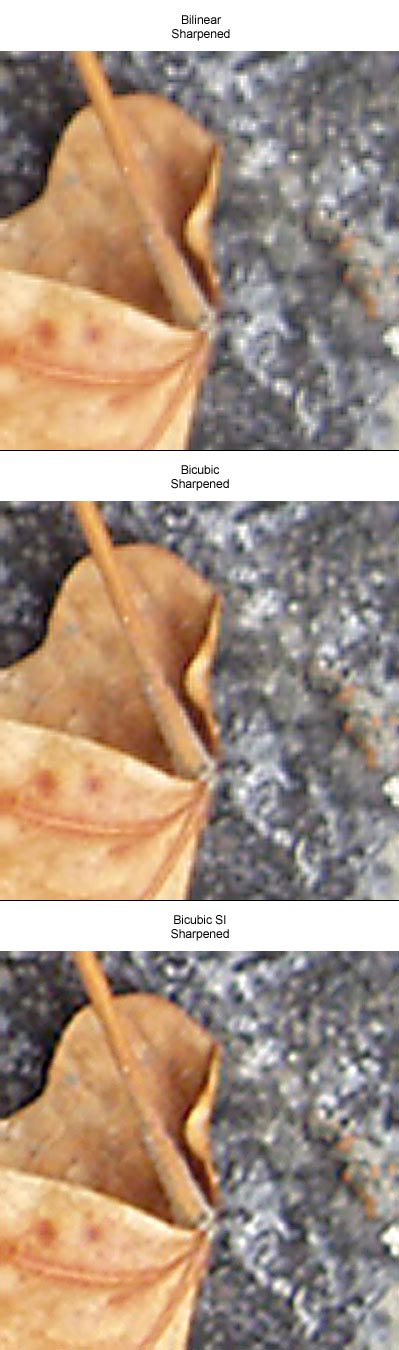
In the first two (Bilinear and Bicubic) the image quickly pixellates while Bicubic SI manages to retain a nice soft quality. All this leads me to believe that Bicubic SI is the best method to use if you want to upsample an image to a larger size. (At least in terms of what you can do without another program like Genuine Fractals or something similar -- and even then, from what I've been able to find, Bicubic SI seems to do a better job.) So what is Bicubic SI? Basically, instead of jumping straight from a 100 pixel image to a 400 pixel image using the Bicubic mode, you do it in a series of small percent steps (SI=Stair Interpolation). In the above example, I took the following steps: 2. Clicked on OK, and let Photoshop resize the image. (Changed the size of the image from 100 pixels to 110 pixels.) 3. Repeated steps 1 and 2. (Approx. 110 to 121 pixels.) 4. Repeated steps 1 and 2. (Approx. 121 to 133 pixels.) 5. Repeated steps 1 and 2. (Approx. 133 to 146 pixels.) 6. Repeated steps 1 and 2. (Approx. 146 to 161 pixels.) 7. Repeated steps 1 and 2. (Approx. 161 to 177 pixels.) 8. Repeated steps 1 and 2. (Approx. 177 to 194 pixels.) 9. Increased the size of the image by approximately 2.5%. (Approx. 194 to 200 pixels.) 10. Repeated steps 1 through 9. (Approx. 200 to 400 pixels.) (I have the first 9 steps set up as a Photoshop action – I ran the action twice.) Is the quality worth the time? That's going to be something you have to decide. As the image gets bigger, it takes increasingly longer amounts of time to run through the process. I've come to the conclusion that for my work, it is indeed worth the time.
Home -
Challenges -
Community -
League -
Photos -
Cameras -
Lenses -
Learn -
Help -
Terms of Use -
Privacy -
Top ^
DPChallenge, and website content and design, Copyright © 2001-2026 Challenging Technologies, LLC. All digital photo copyrights belong to the photographers and may not be used without permission. Current Server Time: 07/15/2026 01:04:23 AM EDT. |