| You are not logged in. (log in or register) | |
|
|
Tutorials :: Sharpening Halos And How To Hide Them
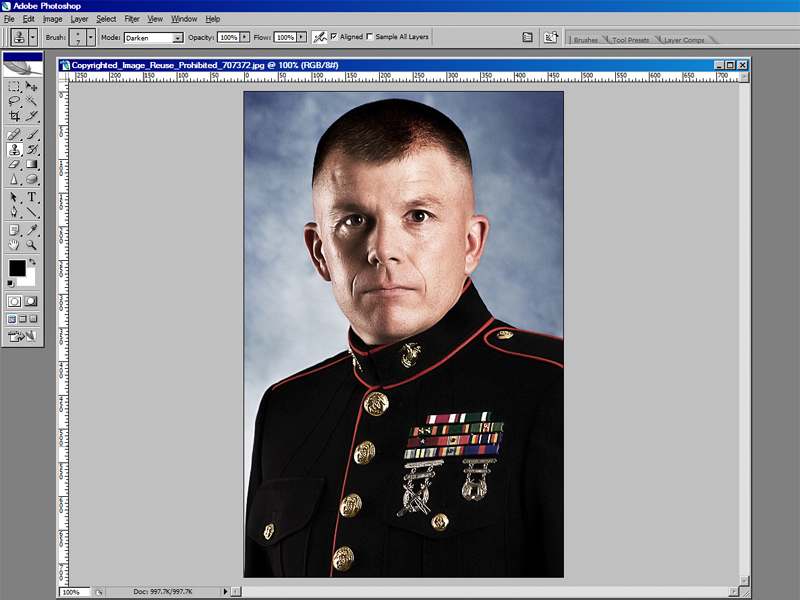
Sharpening Halos And How To Hide Them by BradDigital photograph is soft by nature, yet when sharpening methods are applied, we are often left with edges that have white, or light-colored halos, particularly on high-contrast edges, such as trees, antennas, poles, wires, and even people. Here is a method to remove the white halos in a very easy-to-do way, on large or small images, but make note that this is not legal in basic editing challenges, as it involves cloning of pixels from a darker area, over the lighter area(s). Toddhead was kind enough to allow his challenge image he submitted for the Your Occupation III challenge as the donor image to show how to remove the halos using Adobe Photoshop.
The halos can be seen as the white “shadows” around high contrast edges as shown in the above image, and when magnified/zoomed in on, can be rather noticeable as seen in this magnified view:
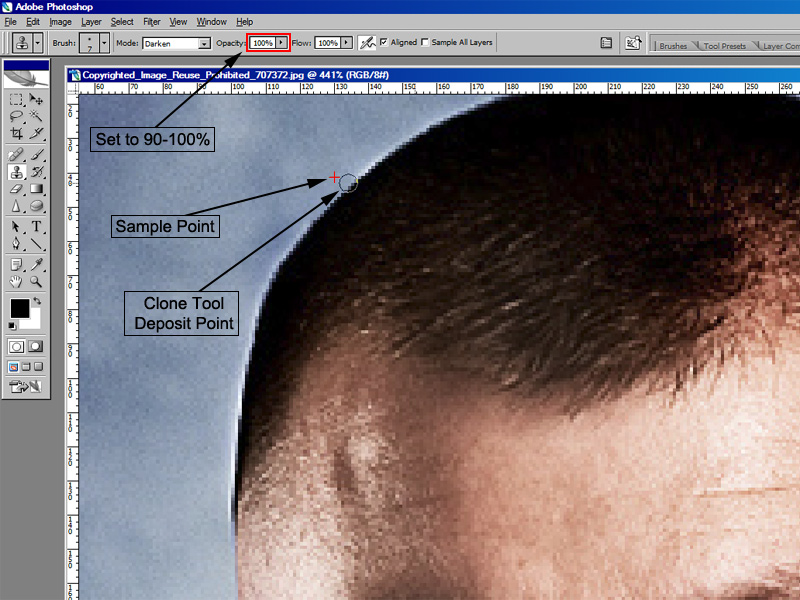
What we will be ultimately doing, is to take some darker pixels from right next to, or close to the halo, and replacing them over the lighter than sampled pixels, using the clone stamp tool in a different mode than normal – the darker mode. With the image open, preferably in a duplicate layer, select the Clone Stamp Tool (S), choose a small, soft-edged brush, go over to the Mode drop down box and choose Darker. Set the strength between 90-100% and flow at 90-100% for most edits as seen in the image below.
So let's clone. As mentioned previously, we will sample from right near the halo, preferably at a right angle to the edge, using the Alt key on the keyboard and click to select the source (darker pixels), then using your mouse or trackball or tablet, drop the clone tool on top of the white halo pixels, drag along and get a feel for how close to sample, brush sizes, etc and start working along the edges. It's very easy to get going and see the instant results. Often it's best to sample just slightly ahead or behind the right angle point of dropping the cloned pixels so as not to make parallel lines along the edges and keep a more random look. As seen below, the red + is the selection using the Alt click, and the circle is where the selected pixels are being dropped with the brush. This is not a delicate thing to do, as the cloning will only write over the pixels that were lighter, (one time we can sort of scribble outside the lines).
Continue to work around the edge until a section is done. Don't worry about starting & stopping, as you could go over & over an area and have no effect if the pixels are no longer lighter where the darker ones were dropped. Continuing on over to the other side, sample as shown and drop the sampled pixels over the white halo to the left this time, as shown below:
Once done, view normally, zoom in if needed and check to see if any areas were missed and make your corrections if needed before merging/flattening the layers.
2 – 5 minutes later, and this one is ready to salute!
Home -
Challenges -
Community -
League -
Photos -
Cameras -
Lenses -
Learn -
Help -
Terms of Use -
Privacy -
Top ^
DPChallenge, and website content and design, Copyright © 2001-2025 Challenging Technologies, LLC. All digital photo copyrights belong to the photographers and may not be used without permission. Current Server Time: 04/01/2025 03:39:18 PM EDT. |