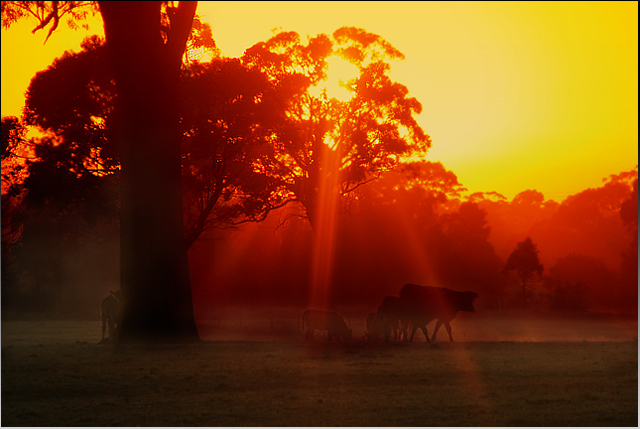
Another beauty!
Fixing this one is fairly easy (this is with CS2):
1) Duplicate your base layer.
2) In this new layer, create a mask that makes a rough selection of the top left 1/4 (the trouble area) so as to minimize the following steps to that region (may or may not be necessary, but I prefer nondestructive editing and this will also give you one click comparisons in the end).
3) Working on the masked layer 2: With your magic wand, click & select that bothersome red strip. You'll need to adjust the tolerance control setting in order to get the isolation right, but I would guess a setting around 20-25 would do. Make your selection right in the reddest part, which will probably give you a small selection of 'dancing ants', then go to Select > Similar. You should now have a lot of 'dancing ants' everywhere. Go to Select > Feather and choose a value between 4 & 12 pixels to soften the selection a bit.
4) Now, switch to your burn tool - choose a brush size equal to about 5-15% of your entire image width (like 200 pixels) and with hardness set to zero, set the range to 'highlights' and the exposure to around 25%.
5) Start clicking on your selection areas to bring down that red halo. You might find it easier to see your results if you hide your selection indicators (View > Show > Selection Edges). Play around a bit with it see what works & to also see if your selection was good (undo is your friend here, so make sure you have plenty of undo levels set in your preferences!) If you find you're darkening too quickly, then lower the exposure setting even further.
The biggest problem you'll have here is the overlap of your selection, so make sure you have that right before you start burning or you'll end up getting a dark lines mimicking the old bright ones! Also, remember you can fine tune your layer 2 mask, settings & opacity so that the overall effect is more subtle.
6) Hide & unhide your layer 2 to see the improvement! If it is unsatisfactory, try doing it over with different settings...
Message edited by author 2007-01-13 03:12:17. |