I had originally planned on entering a different pic, but due to the freezing cold weather over here in Canada (-20 degrees with wind chill) and high winds at night by the lake, it was impossibly to get a decent result... I'll save that shot for the summer time.... so I went with this instead...
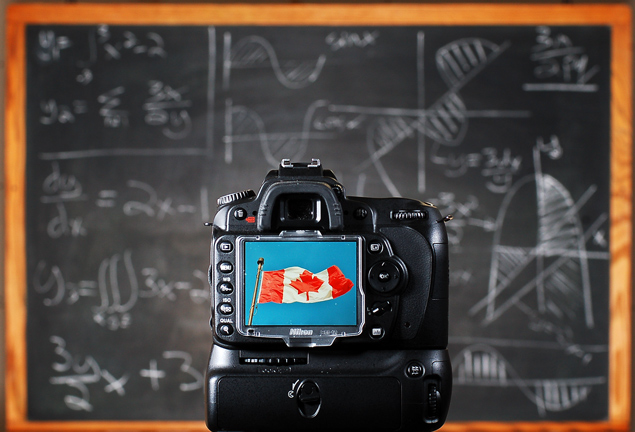
since it is a self portrait without people, I figured I'd do a portrait of what I am, rather than who I am. I am a teacher, I am a Photographer, and lastly, I AM CANADIAN!
i'll post some setup pics later, but basically, it's one soft box in the floor aimed up to the chalkboard, and for the camera, two lights with 20 degree grids, one fror each side of the camera to light the camera...
These multi light shots are quite easy (for still life shots (no motion at all), basically, start by setting the aperture for the depth of field you would like, in this case, just enough to barely be able to make out the writing on the chalkboard, then match the shutter speed to properly expose the camera LCD. Now you are good to go... so start taking some test shots, and adjust the power of the lights until everything is set right...
remember:
For Still Life with Lights:
1. Set apperture for desired DOF
2. adjust shutter speed to properly expose un-controllable light sources, like camera LCD screen, Sun set, ect...
NOTE: shutter speed will probably have be 1/200 sec or slower
3. go around and adjust the power and position of all your lights
... sooo... set the camera FIRST, then monkey around with the lights... WHY???? well, lets say that you set the lights first, took your pics, and was like WOW! lighting is PERFECT!!!... then you look closet and then go "Uh Oh, I need more DOF!!!"... "oh, that's easy, i'll just turn the little knob on my camera"... then take another pic and then "Huh? why is my lighting messed up???" when you change your apperture, you will either be allowing MORE or LESS light into the camera, so it makes your lights SEEM brighter or darker to your camera, now you have to go and screw around with the power of your lights all over again...
Camera first, then lights.
If you need any help, please PM me, i'd be glad to help
If you think that i'm wrong and want to tell me that i'm a stupid idiot, please PM me, i'd be glad to hear about it..
How will this do? probably not that great... meh =)
-------------
Here's a setup pic - you can see my D50 (used to take the actual pic) behind the D90 (in the pic) with the two grids pointing towards the D90... the white box on teh bottom is a softbox pointed at the chalkboard... it WILL leave an overexosed circle ont eh chakboard because it is fairly direct light, BUT that bright spot of light was intentionally used as a birght 'Halo' around the area where the camera covered the chalk board...
.
.
Statistics
Place: 14 out of 157 Avg (all users): 6.2833 Avg (commenters): 7.4000 Avg (participants): 6.1064 Avg (non-participants): 6.3459 Views since voting: 2034 Views during voting: 342 Votes: 180 Comments: 17 Favorites: 0
This is a different take than the disastrous attempt that I made at doing something similar. I'm voting your 4 points higher than what I'm showing for a score...
I like the idea for this photo a lot and your title really pulls it together. Nice framing with the blackboard, nice dof and good clarity on the camera.